In many of the print-related workshops I am involved with color and color reproduction invariably come up. The assistance I provide is varied and multifaceted but without fail it all starts with white balance before anything else when post-processing files.
Everyone that’s shot RAW files and used any post-processing software knows all about white balance right? It’s not a glamorous topic but bear with me, there are a thousand reasons this most basic of camera and post-processing parameter are worth revisiting.
Let’s start with a controversial statement; The differences in color between all digital cameras are at least 90% attributable to white balance. I mean this in a very broad sense. The way different cameras interpret a scene when using auto WB, the differences in how different brands and models differ in the white balance presets (daylight, cloudy, shade, etc), the way different cameras are calibrated (profiled) with various light sources for various RAW processors, and sometimes particular sensors filters, as well as RAW processors, deal with narrow-band light sources. That last item can be considered an edge case.
Do different cameras have differing gamuts? Do different RAW processors have different calibrations/profiles and algorithms? Are there other differences beyond white balance? Sure but they are far down the list after white balance. I’ll cover some of those in future installments of this series.
An Example Of Reproducing Color From Capture Through Print
Les Picker Fine Art Photography has a great relationship with Moab Paper. It’s been developed through years of cooperation all starting with our use of their papers in workshops. They’ve done us favors and we are glad to do them favors if possible. I am involved as I participate in all those printing-related workshops given my shared passion and love of photographic prints.
Recently they needed a couple of images made very quickly as in now, today. There wasn’t any time to optimize the gear, setup, or methodology for what was required. I had one light and one C-stand available that day in the space usually used for our workshops. No white seamless paper, no V-flats, you get it. One light, my camera, and a c-stand. The effort was simple enough, capture the surface texture and appearance of Moab Papers.
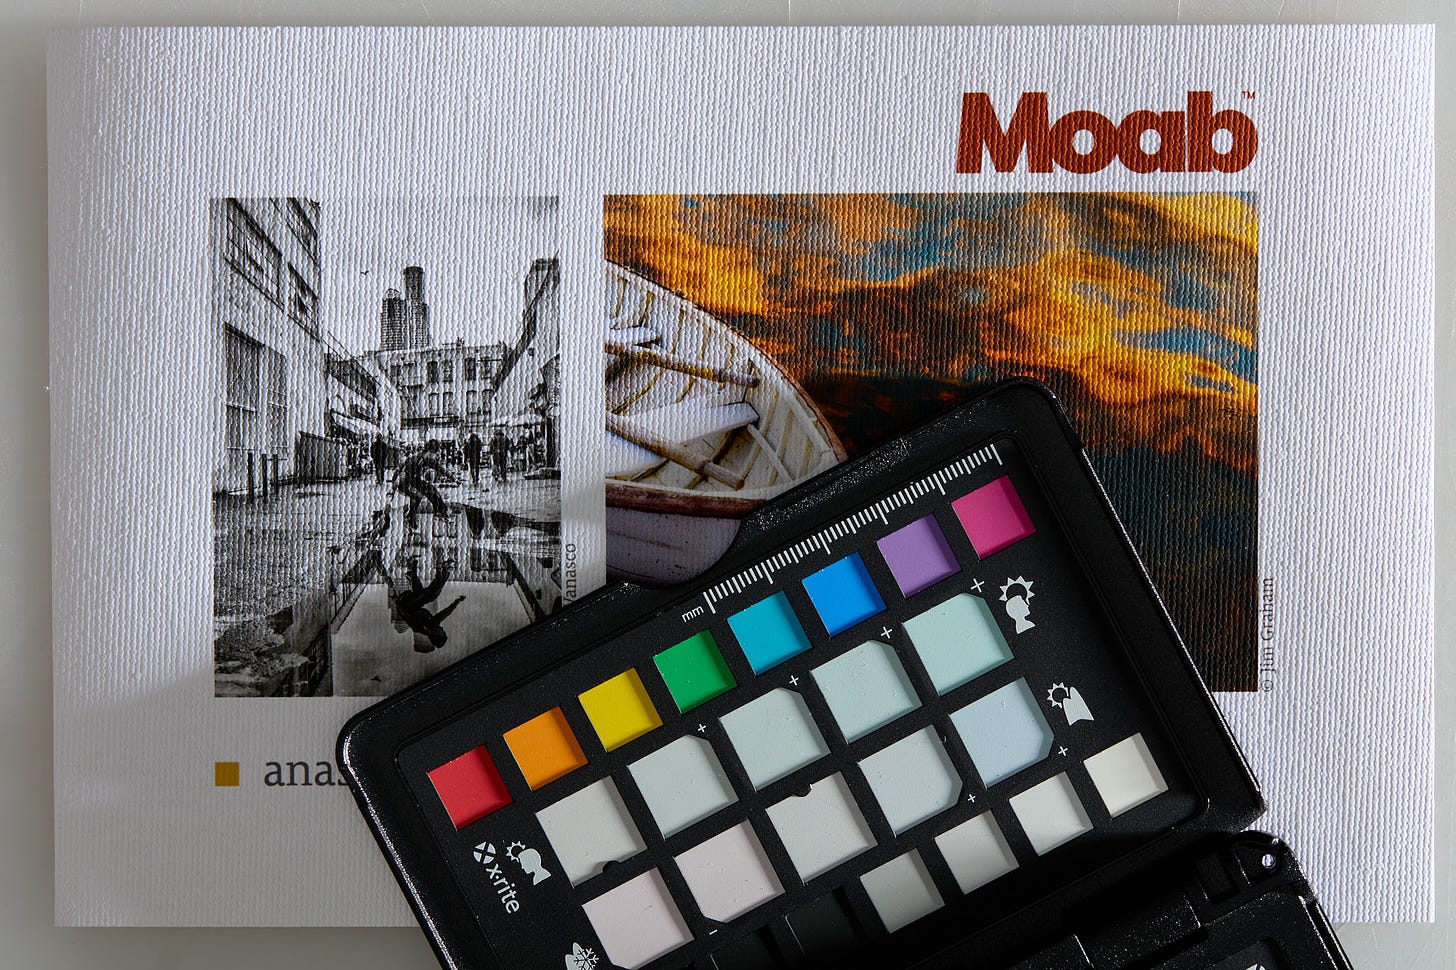
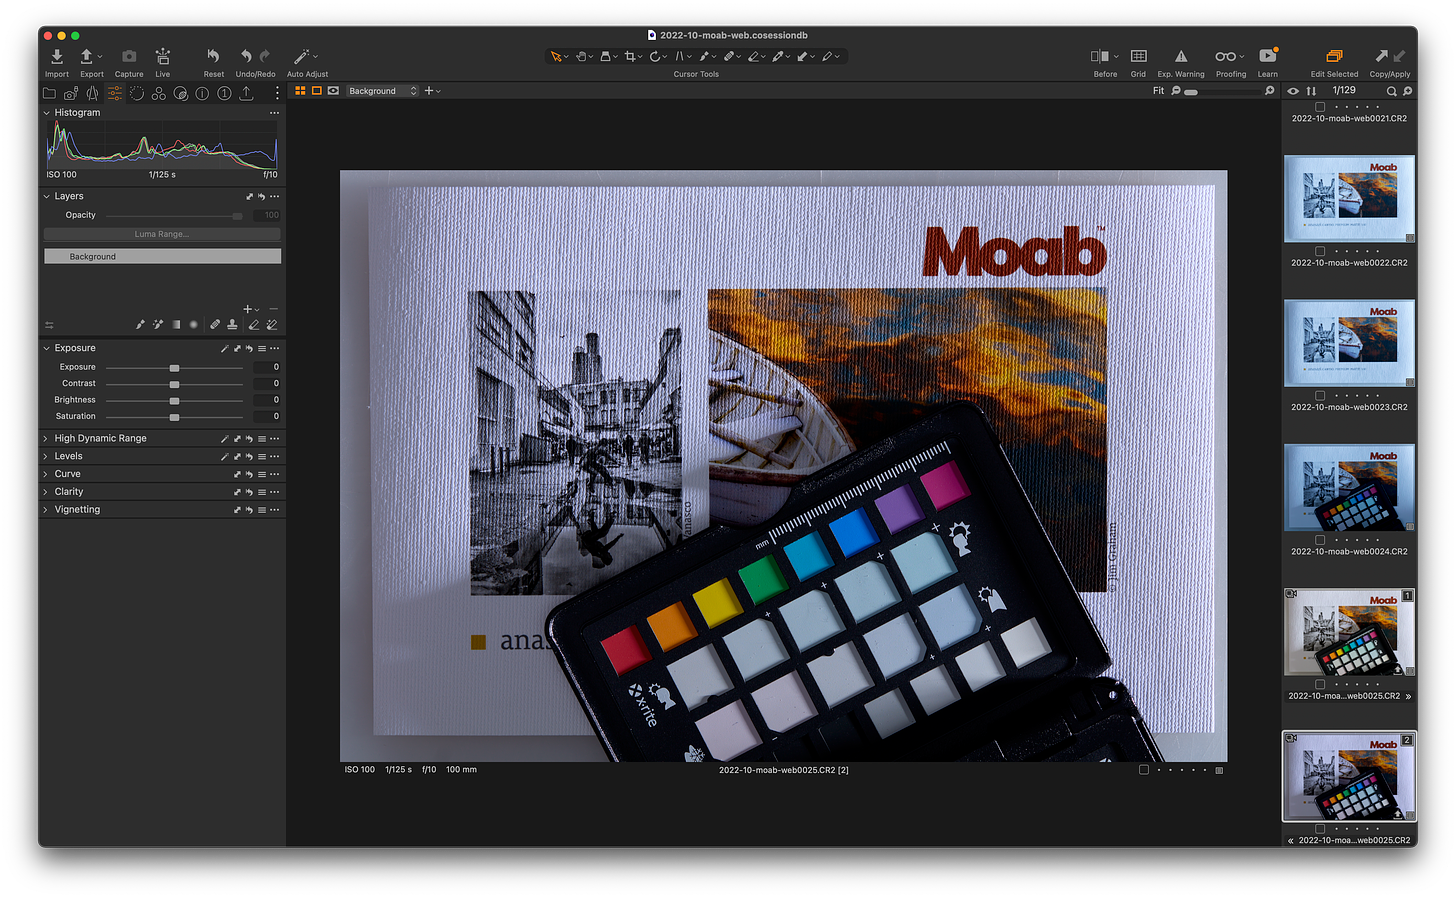
The image at the top shows a fairly simple setup. This should be a piece of cake right? My camera is mounted pointing down on a C-stand, I’ve got a neutral (white) cutting mat as a background, a print on a white (neutral) canvas, and an X-Rite color checker for calibration.
Given the goal of illustrating texture, the light was a Profoto D4 head with a Profoto zoom reflector at a 90° angle to the paper with no fill. The bog standard lighting maximizes the texture of a subject. Note the appearance of all the supposedly neutral things in the picture from the color checker, to the cutting mat, to the canvas/paper print. Are they neutral?
Typically in this kind of setup or any kind of setup where I am producing multiple shots, I’ll do an in-camera white balance calibration using a gray target like the one included in this color checker. Then I’ll optimize exposure based on that calibration. This was all shot tethered using Capture One via remote control. Works great and is my standard operating procedure. I was having a heck of a time with in-camera calibration. I tried a half dozen times. Every time I got very different results, it was clearly visible on the workstation screen, the WB numbers were coming up all over the map every time I shot a new calibration.
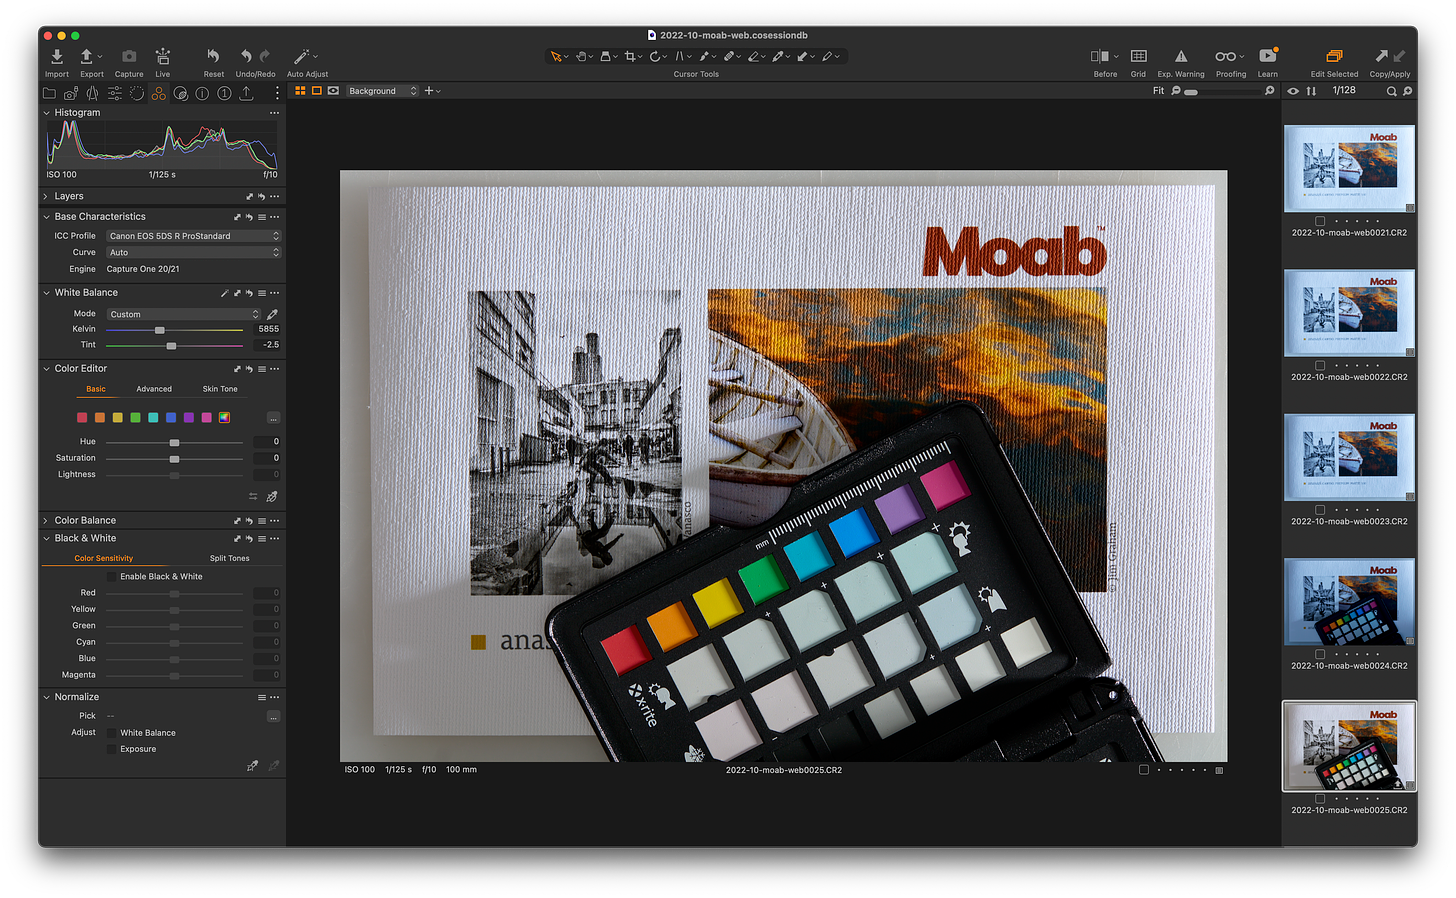
In consideration of saving time, I decided to skip in-camera calibration and just chucked in the color checker every once in a while if I changed the power output of the flash as the D4 heads have decent color consistency shot-to-shot but vary a hair with power settings. You might be asking yourself why I decided on such a low exposure. Take a look at the screenshot below. Specifically the blue channel of the histogram in the upper left corner.
I am right on the very edge of blowing the blue channel in this shot. The top values of the blue channel here are registering 253-255. This is it, that’s all the exposure this scene can take. Even a third of a stop blows a significant portion of the blue channel. That screenshot is after white balance calibration.
Take a look at the same image with a “daylight” white balance preset which was close to some of the in-camera calibrations that I was seeing. Note that the exposure is even darker with the blue channel completely blown in the histogram. I had to shoot this paper/canvas a half-stop darker to retain the blue channel. I played with the in-camera white balance to get close enough and ended up shooting all of the papers with optical brightening agents a half to a full stop less to retain the blue channel and equalized the brightness in post to those of the neutral papers.
Problems Dealing With White Balance In Post
After I finished photographing the inventory of papers I set about what should have been about five minutes of post-processing. All that needed to be done given the recipe above was to neutralize the shots via the included color checker and equalize the density/brightness of a couple of shots with reduced exposure by a known amount. Easy, or so I thought.
Every single click on any of the gray targets on the color checker was producing wildly different results just like when I was trying to do the in-camera calibrations. What’s going on here? It took me about 5 minutes of stepping back and realizing this was an issue I’ve dealt with over and over and over again in various locations. There was color introduced to the scene based on light being reflected by the environment. I’ve learned that painful lesson of shooting in many environments in the past. The solution is typically a neutral reflector if you want or need fill or a black card if you don’t. Hence my love for v-flats.
Those shadows introduced by the hard 90° lighting angle are very dark and you cannot see what color they are. They look black, don’t they? They are not black as in very dark neutral gray. They are colored significantly by the dark brown wood cabinets, beige stone tile on the opposite wall, and maybe even a hair by the warm room lighting which shows up as black without the flash.
My mistake was assuming that the color checker patches were smooth enough not to have two wildly different lighting colors contained in each patch. They are not. Take a look at the pixel-level view on a retina monitor (as in very small pixels). It’s a giant mishmash of texture lit by the flash head and shadow lit by that very very low fill from the very warm environment opposite the flash.
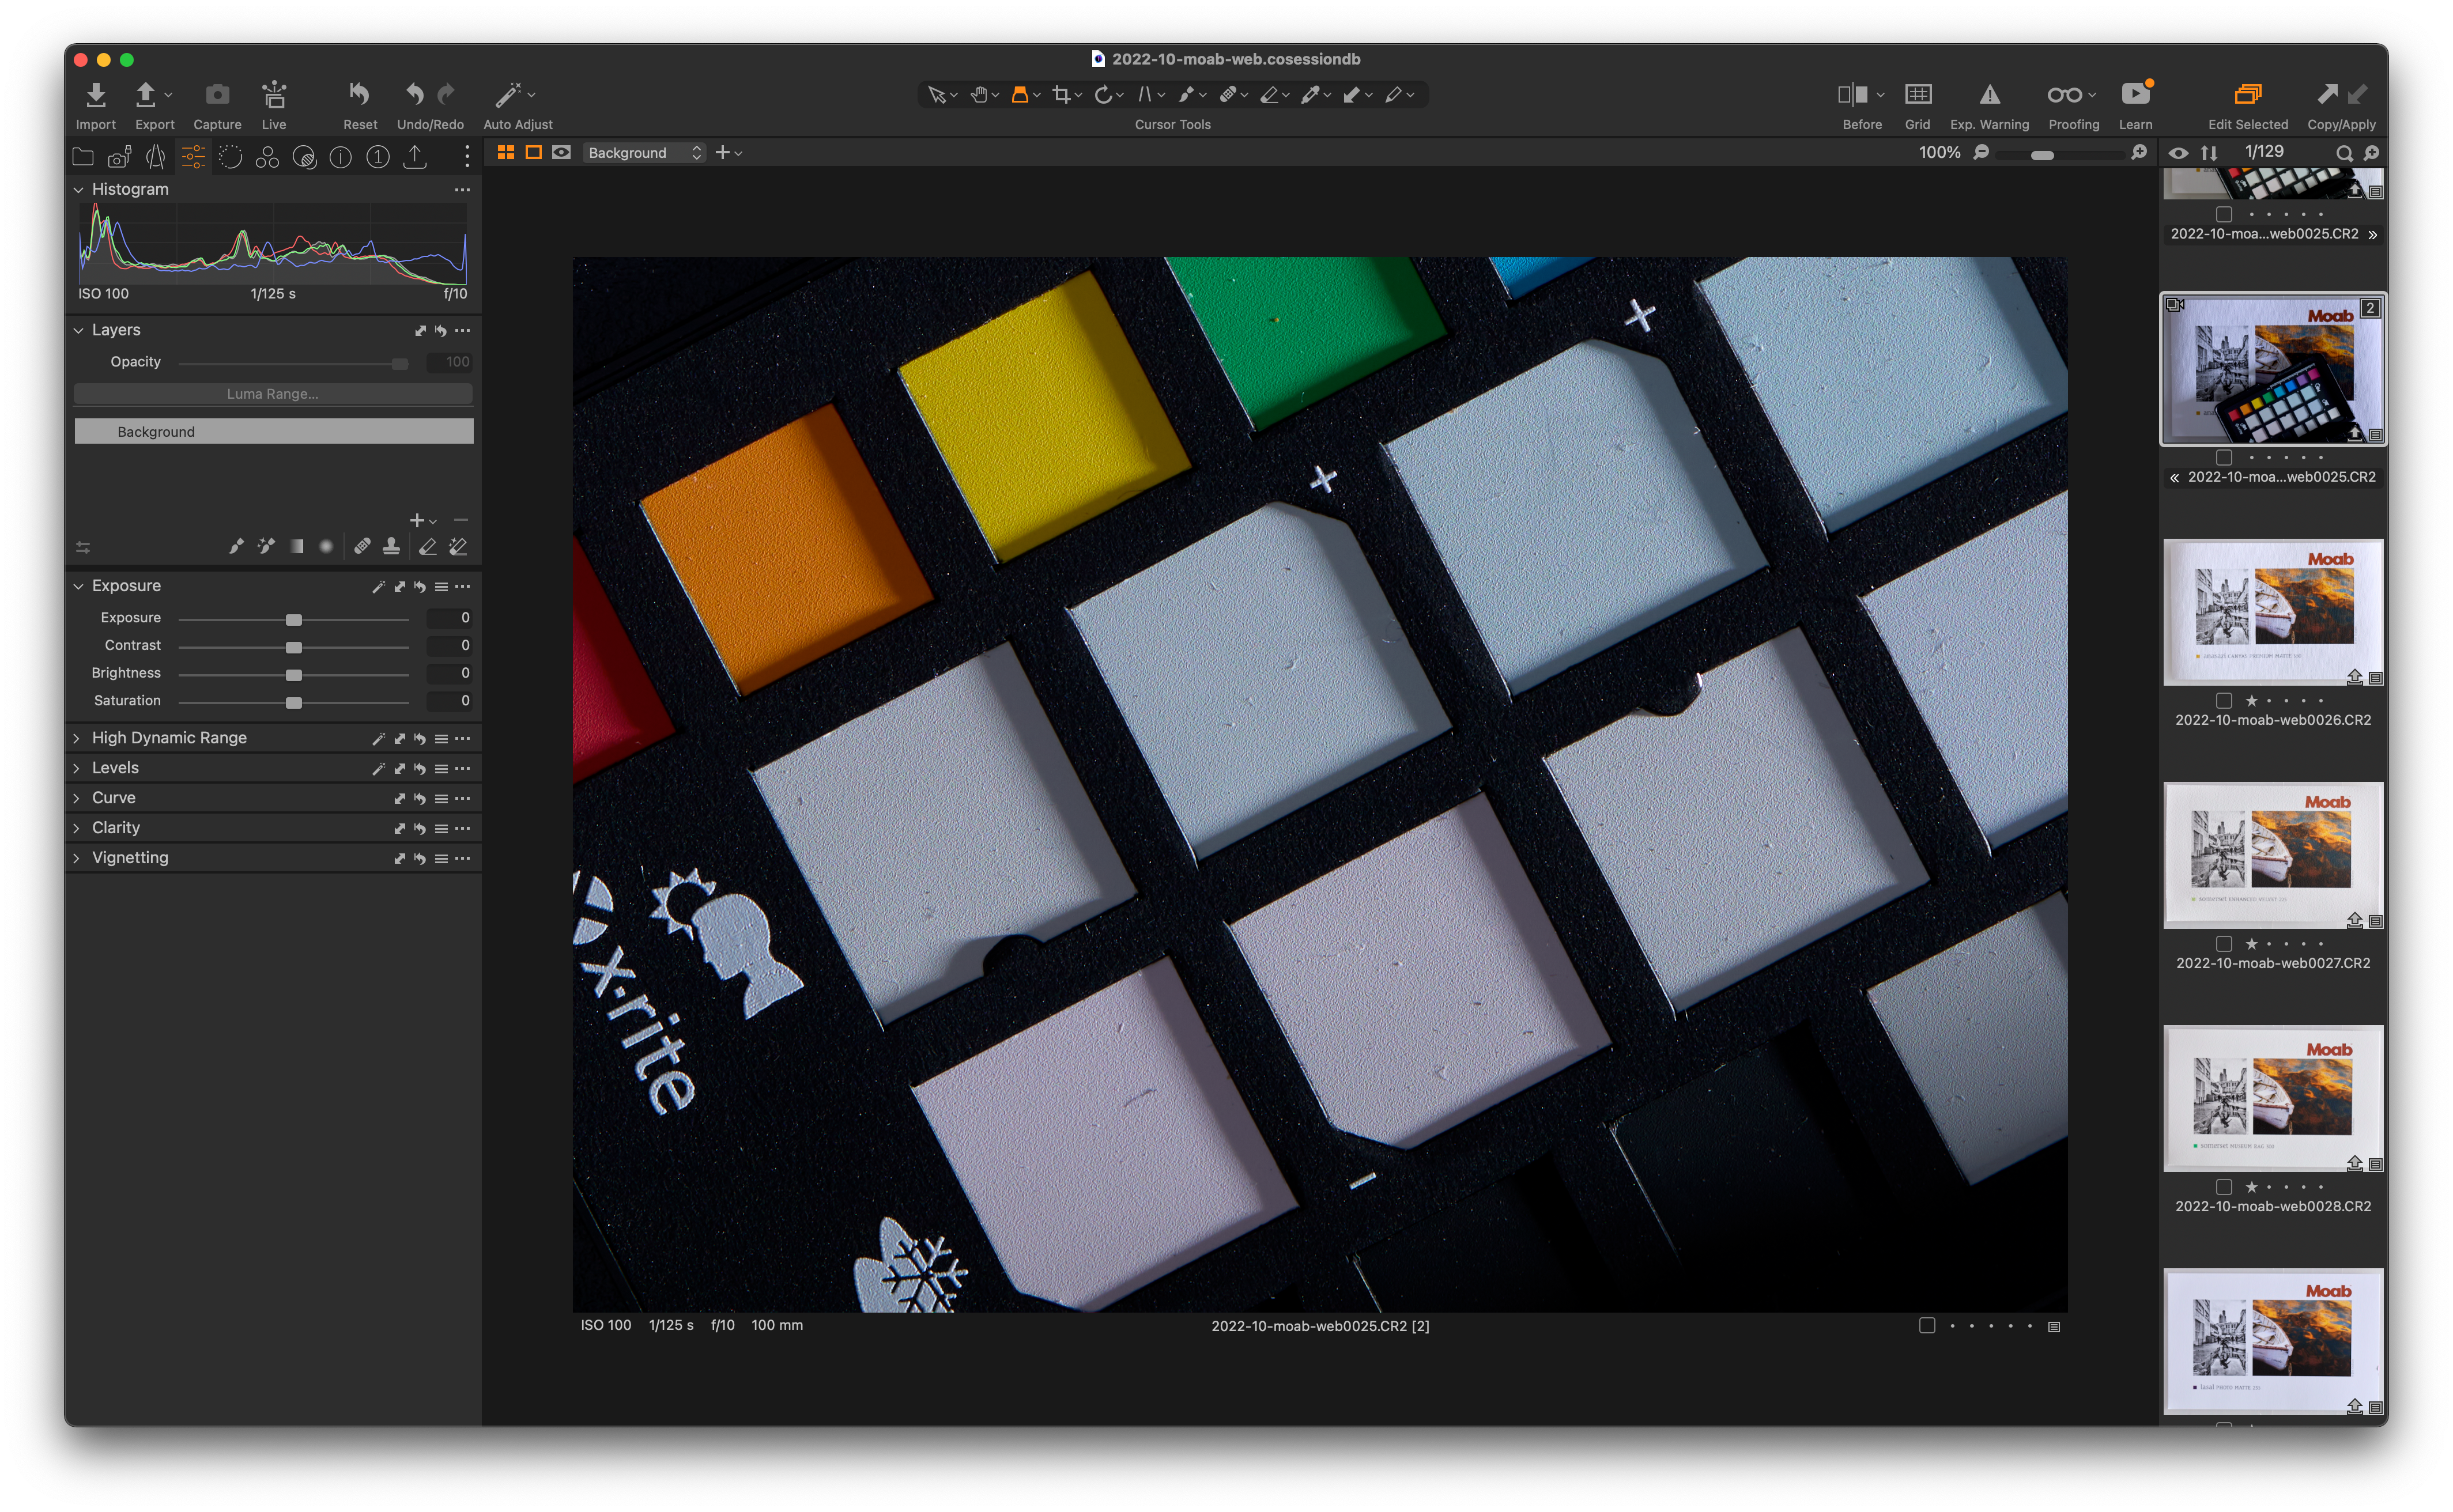
Yes, I was able to neutralize it all to the light source but it took a bit of ingenuity and far more time than five minutes. After I was done the conversation turned to neutralizing the paper base color and density level or illustrating that difference specifically. Either is a valid illustration depending on what one wants to show. Far more on that and optical brightening agents another day in future installments of the series.
Great Story, What’s This All Mean To You?
I know that most readers in the community don’t have a need to carry accurate color from capture through print nor shoot in a studio, nor use strobes a lot. If you do maybe a few tidbits here can help. How about landscape photographers or natural light photographers or street photographers?
The first thing to take away is the myth that you can always worry about white balance later. This is a bad idea, especially with landscape photographers but generally all photographers. Perfectly neutral colors are typically not what photographers want. I’d propose that the vast majority absolutely, positively do not at all want neutral colors. I am not suggesting you pull out a color checker and put it in every scene. This goes doubly for those that are not going to use a neutral white balance in their final work.
I am suggesting you have an idea of your intended rendering of a scene and set your white balance close to that intended rendering. Since the dawn of color photography, most landscape photographers do not want to neutralize a scene for accurate color of the subjects in the photo. What they want is to render the feel and color of the light itself. You want dawn to look blue and cool, you want sunsets warm and orange and pink. In a word the color of the light is what you are photographing.
Neutralizing it will kill the picture. Maybe auto white balance is a bad idea. Typically if you want the characteristic color of the light to be prominent daylight white balance is the place to start. If you want to double down on that color and make it even bluer or warmer set your in-camera white balance appropriately be it a preset or via Kelvin scale. Pay attention to the tint as well.
This isn’t preaching about getting it right in camera. That’s a perfectly good discipline and don’t know anyone that would advise against it but it’s far more. If you’ve not learned this yet you will but the average histogram can tell you big lies. Those are lies of omission. If you’ve not done so please, please start using the RGB channel histograms instead. Doing this will help you avoid blowing color a channel. Are you seeing the connection about in-camera WB settings yet?
What happens when you blow a specific color channel? In many cases, you make it impossible to get decent color in your prints no matter what you do. With landscapes, you’ll get flat highlights, with skin you’ll get odd skin tones that are impossible (or very difficult) to fix. On the other end of the spectrum the farther you put things in shadow the worse the color gradation. Sure it’s better than it once was in terms of noise pollution but it still holds true (and probably will) actual color gradation and accurate reproduction it’s better the farther up the exposure scale you render the scene.
We’ll cover far more on color, camera/RAW calibration, and processing for print as well as optical brightening agents in future installments. I wanted to level set the importance of white balance as a starting point from the point of capture and evaluation of exposure as a starting point.
This was not the newsletter we planned to publish this week. I take all responsibility for grammatical errors, typos, content, and any lack of clarity as the editor super hero Les has experienced calamity after calamity during tropical paradise get-away. I’ll defer to him in terms of sharing any details. Needless to say, he’s not available this week.
As usual feel free to ask for any clarifications, details, or questions for all the things I left out of this installment. Feel free to add your own triumphs and tragedies regarding color capture and rendition. I am sure there are members of the community who have a lot of valuable input.


Achieving "white balance" is sort of like making soup, there are a lot of ingredients, some of which are out of your control. We can start by acknowledging that different manufacturers have different goals. In the film days, the Fuji brand films had a much different color balances than any of the Kodak films. In addition, each company offered films with unique responses to mid-day light.
I saw the same thing in lenses. Again during the days of film, a group of us looked down various 300mm f2.8 and more standard zoom lenses aimed at a white surface in daylight. The Pentax lenses were warm, the Tamron lenses were slightly warm, and the Nikon lenses were neutral. I don't recall the results for the Canon lenses. My Fuji large format lenses are warmer than my Schneider and Rodenstock lenses. I haven't done similar comparisons on modern lenses.
Tim Parkin, publisher of a British online landscape magazine, "On Landscape," measured the spectroscopic transmission of 10-stop neutral density filters, split neutral density filters and polarizing filters. He found significant variations among the filters in each group.
How many photographers or clients have a flat visual response to white light? That's where the artistic interpretation comes in. If your final product is a print, then there is also the color of light in which the print is displayed.
An old TV advertisement used to pose the question, "What's a mother to do?"
Given all of the uncontrollable variables, I've taken a fairly simple approach to white balance. If things look out of wack, as may be the case when I make a photograph of a winter snow scene in the shade, I use a color adjustment to "correct" my whites, and then something on the grays if present. That's a starting point. After that, I ignore color balance and concern myself with artistic intent. I may add back some blue to that shaded snow scene for example. No one is going to take a color spectrophotometer to my prints, although they may still say that one may be too much of something in the light in which they are displaying it. Editors may change the color balance of one of my files which can be frustrating, but they also turn my vertical compositions into horizontal ones or vice versa when it suits their purpose. I just take a walk outside.
I was caught by your mention of adjusting color channels so that one color isn't out of range. Looks like I have some homework to learn about adjusting colors in channels.
My in-camera lighting balance set for 5,000K. A bit warm for shadows and a bit cool for highlights, therefore allowing me to adjust +/- 500 deg for effect and not letting the camera decide via the processor what color temp the scene should be.
I do have a profile from my Passport, for the camera in my raw settings, that is applied at the beginning of the workflow for color balance. Sometimes there is a slight change and other times negligible.